
Gaining direct access to data from your environment requires more than just a simple purchase in a store. Interoperability between devices remains a frequent source of frustration, even among seasoned users. Some protocols used in consumer IoT devices do not guarantee service longevity, exposing users to unexpected interruptions.
Starting to create a connected object often involves navigating between disparate resources, from online learning platforms to specialized communities. However, the variety of technical solutions available allows for the adaptation of each project to its specific needs, taking into account security and compatibility constraints.
Recommended read : Top alternatives to Pogu Live: where to watch your favorite streams in 2024?
Understanding the basics: from idea to design of a connected object accessible to all
Before pulling out the soldering iron or diving into programming, it is essential to precisely define the utility of the connected object to be created. Is it about monitoring the temperature of a room, automating shutters, or optimizing electricity consumption? This concrete definition then guides all subsequent steps: choosing the appropriate sensors (temperature, motion, humidity…), reflecting on the architecture, and anticipating actual usage.
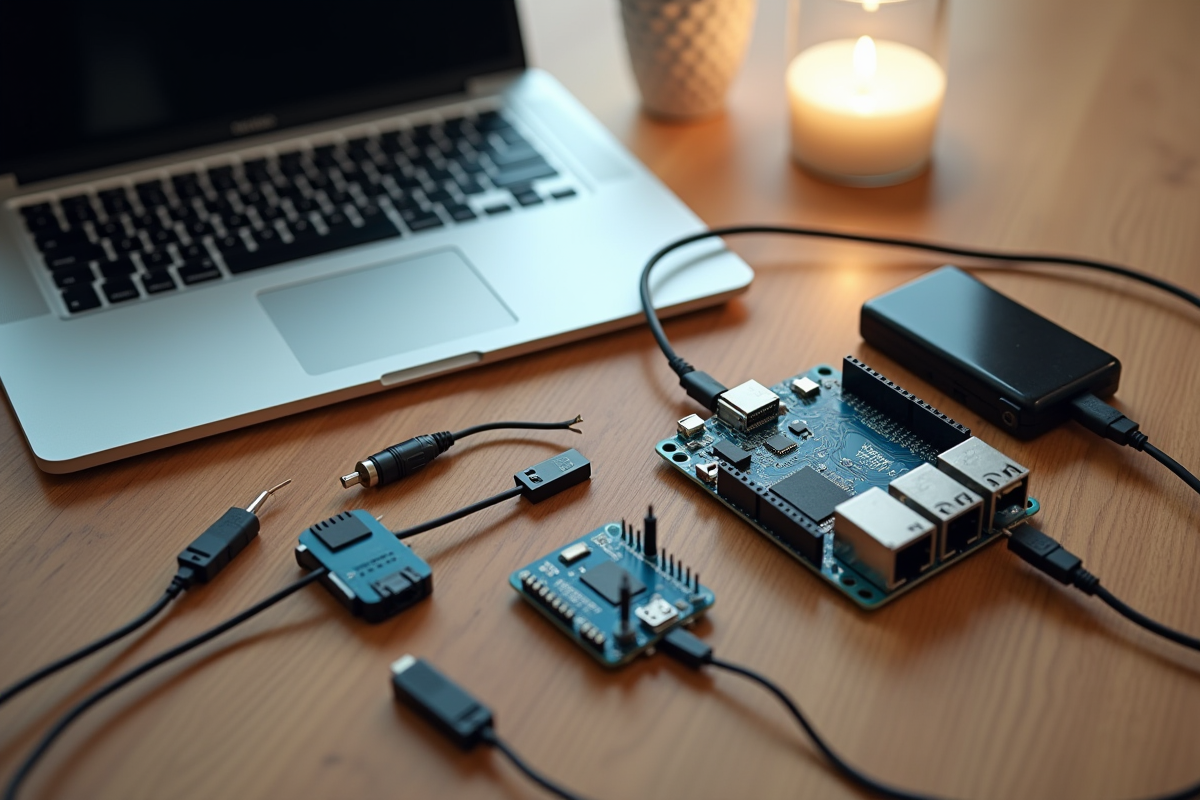
The beating heart of any IoT project is the electronic boards. They ensure the collection and transmission of connected object data to the outside. Take the Gertduino: this prototyping board stands out for its compatibility with numerous modules and sensors while remaining accessible to beginners. It opens the door to concrete projects: automating lighting, monitoring a vegetable garden, or building a tracking system for everyday home automation.
You may also like : Roamler: Tip for Supplementing Your Income or a Real Scam?
Another crucial crossroads: the choice of communication protocol. Should one opt for sigfox, LoRa, or rely on Wi-Fi? Each solution has its strengths. To transmit small amounts of data over long distances without consuming too much energy, sigfox and LoRa are the frontrunners. In contrast, Wi-Fi offers much higher speeds but at the cost of more limited autonomy. These are trade-offs to consider based on the nature of the project and the environment in which it will be deployed.
Digital fabrication truly breathes life into customization. Thanks to open-source tools and resources shared by the Mines-Telecom Institute, anyone can progress at their own pace, assemble their own modules, and integrate connected object communication according to their desires, without relying on a closed ecosystem. It promises a gradual discovery, where autonomy grows with each step taken.
Installing and integrating your first connected object at home: practical resources and ways to learn independently
Diving into the world of connected objects often starts with adding a modest device at home: a connected weather station on a windowsill, a home automation sensor to monitor a door or control heating. To get started, all you need is an Arduino board, or one of its equivalents. This component links the sensors (temperature, humidity, light…) to the chosen network for transmission.
Here are the main steps to connect these elements:
- Assemble the various sensors and connect them to the electronic board.
- Download and upload a basic program via the Arduino interface or similar software.
- Connect the board to the network: Wi-Fi if the object needs to communicate with your router, Bluetooth for nearby exchanges, Zigbee when multiple devices need to communicate, or sigfox, LoRa, LTE for maximum range, ideal for a house far from the city center.
To control everything and visualize the measurements, transform your smartphone or tablet into a true command center. With a mobile application, often open-source, it becomes possible to customize the interface, display the data collected in real-time, and even create your own automation scenarios.
Getting started with programming using an Arduino object is accessible, even without a technical background. Resources abound: community documentation, step-by-step video tutorials, workshops in fablabs to learn in small groups. It is often by testing oneself, modifying the code, and observing the results that one progresses the fastest. Curiosity, exchanging ideas with other enthusiasts, and a bit of patience are all it takes to open the doors to the connected home.
A first connected object is not just a technical challenge. It is also a step towards digital autonomy, where everyone can shape their own tools and take control of their environment. The realm of possibilities expands with each new experiment; now it’s time to choose the next idea to bring to life.